
Using Jekyll with GitHub pages is a great way to cheaply and securely host blogs and informational sites, but where to host it when you want more end to end control and the ability to use additional plugins and tooling like gulp that is not supported.
AWS S3 and Azure blob storage provide cheap reliable hosting without the need to underlying servers but require you to build the site offline before uploading. By making use of AWS CodePipeline a simple CI setup can be implemented to allow automated builds, dev and test stages with optional manual approval.
Create a buildspec.yml
In the root of your website git repository create a new file called buildspec.yml and copy the lines below in. Note additional commands and steps can be added to perform minification or other processing of the site however you will need to install required tooling such as node and gulp either in the buildspec.yml file or via a custom CodeBuild image which is best left for a future post.
version: 0.1

phases:
  install:
    commands:
      - gem install jekyll bundler
  build:
    commands:
      - echo "******** Running Bundle install ********"
      - bundle install
      - echo "******** Building Jekyll site ********"
      - bundle exec jekyll build
artifacts:
  files:
    - '**/*'
  base-directory: _site
Static hosting for your site
AWS provides instructions for hosting static websites here if you would like to add HTTPS to your site AWS CloudFront provide low cost options that let you use free SSL certificates from ACM Which really gives you no excuse not to.
Create a Lambda function to deploy the code once it is built
Using SeamusJ/deploy-build-to-s3 we can setup and register a simple Lambda function that is able to deploy a website artifact to an AWS S3 bucket. While it is possible to do the S3 deployment as part of the buildspec.yml file this does not allow a manual quality gate and review process.
Setup CodePipeline and CodeBuild
Login to the AWS Console and navigate to CodePipeline from here select the option to create a new pipeline, giving it a meaningful name and selecting your website source repository from the available options (at the time of writing Github, CodeCommit and AWS S3).
When reaching step 3 (Build), ensure you choose AWS CodeBuild and create a new build project. Unless you require additional build tooling choose an AWS managed image of Ubuntu with a Runtime of Ruby. Within the advanced options choose a sane but large timeout, 20 minutes is normally more than sufficient without using up all your build time on mis-configured builds.
Other options for VPC and IAM account depend on your security requirements but defaults will generally work well, to get up and running. Finally make sure to select no deployment provider as we will set this up manually next.
You can now select release changes or add a change to your git repository to trigger a new build. You can manually verify the build has worked as expected by downloading the artifact and extracting it a local web server (see SimpleHTTPServer) or your website hosting bucket.
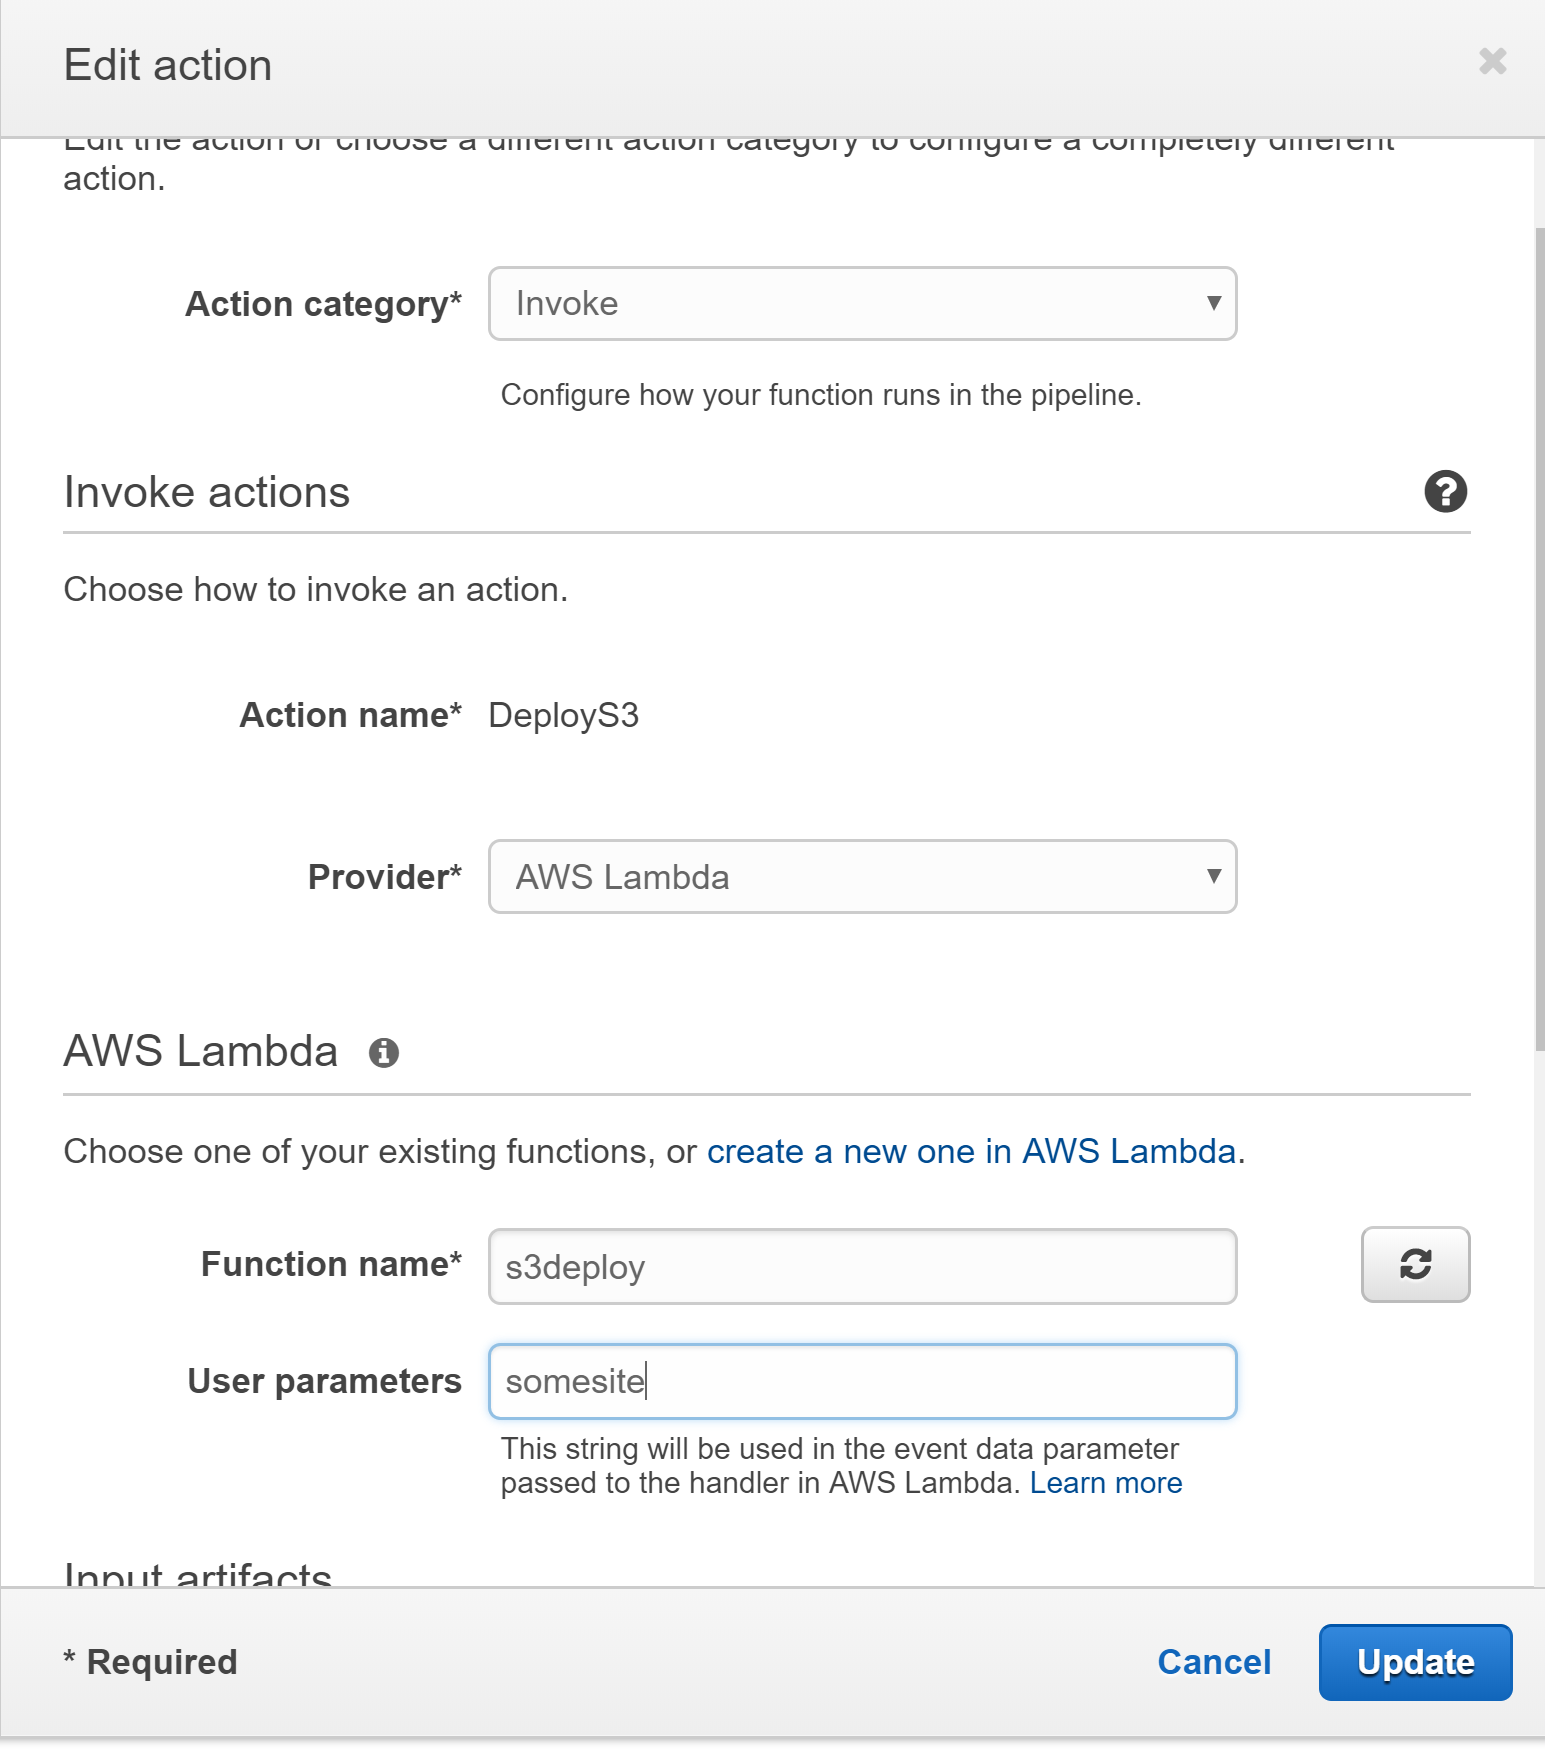
Add the Lambda Deployment to the Pipeline
Within CodePipeline open your pipeline and select edit, add a new stage to the pipeline e.g. Dev within this stage add an action of invoke and choose the Lambda function we created earlier, Input artifact should match the name of the output artifact from the Build stage and the user parameters should be set to the name of your website bucket. If you require manual approval e.g. for Production stage include the relevant actions before adding the Lambda invoke.
Release the Changes
Make a commit or hit release changes if everything has been setup you should have a fully green pipeline and deployed website.
